
Introduction
Builder gel nails have become a popular choice for those seeking long-lasting, durable nails that enhance their natural beauty. However, while they are fantastic for creating strong, polished nails, improper removal can lead to significant nail damage, such as peeling, thinning, or breakage. Knowing how to take off builder gel at home safely is essential for maintaining healthy, strong nails.
Improper removal can be painful and harm the natural nail bed, but with the right tools and techniques, you can avoid these risks. This step-by-step guide will help you confidently and safely remove builder gel at home while keeping your nails healthy and strong. Let’s get started!
What is Builder Gel and Why Proper Removal Matters
What is Builder Gel?
Builder gel is a durable, thick gel product used to add strength, shape, and length to natural nails. Unlike regular gel polish, which primarily enhances the appearance of nails, builder gel provides additional support and structure. It can be used to extend nail length or reinforce weak nails, making it a staple for nail enthusiasts.
How is Builder Gel Different from Acrylics and Regular Gel Polish?
- Builder Gel vs. Acrylics: Builder gel is less rigid than acrylics, making it more flexible and natural-looking. It is also cured under a UV or LED lamp rather than air-dried.
- Builder Gel vs. Gel Polish: Builder gel is thicker and stronger than gel polish, designed to add structure rather than just color.
Why Proper Removal is Important
Improper removal of builder gel can damage the natural nails, leading to thinning, peeling, or even infections. Peeling or forcibly scraping off the gel removes layers of the nail plate, making nails weak and brittle. Taking the time to properly remove builder gel is essential for maintaining nail health.
Patience is Key
Removing builder gel at home requires patience and the right technique. Rushing through the process or skipping steps can lead to unnecessary damage, so it’s worth taking your time to protect your nails.
Tools and Materials Needed to Take Off Builder Gel at Home
Essential Tools and Materials
To remove builder gel safely and effectively, gather the following materials:
- 100% pure acetone
- Cotton balls or cotton pads
- Aluminum foil (pre-cut for convenience)
- Nail file (with 180/240 grit)
- Orangewood stick or cuticle pusher
- Nail buffer
- Cuticle oil
- Hand moisturizer
Optional Tools for Easier Removal
- Electric Nail File: Speeds up the process of filing the gel’s top layer.
- Nail Clips: Can be used instead of aluminum foil for holding acetone-soaked cotton in place.
Safety Tips
- Work in a well-ventilated area to avoid inhaling acetone fumes.
- Protect your skin by applying petroleum jelly or cuticle oil around the nail bed before soaking.
- Use high-quality tools to ensure effective and safe removal.
Where to Buy Reliable Products
You can find these materials at beauty supply stores, online retailers, or local drugstores. Look for trusted brands to ensure the quality of your tools and acetone.
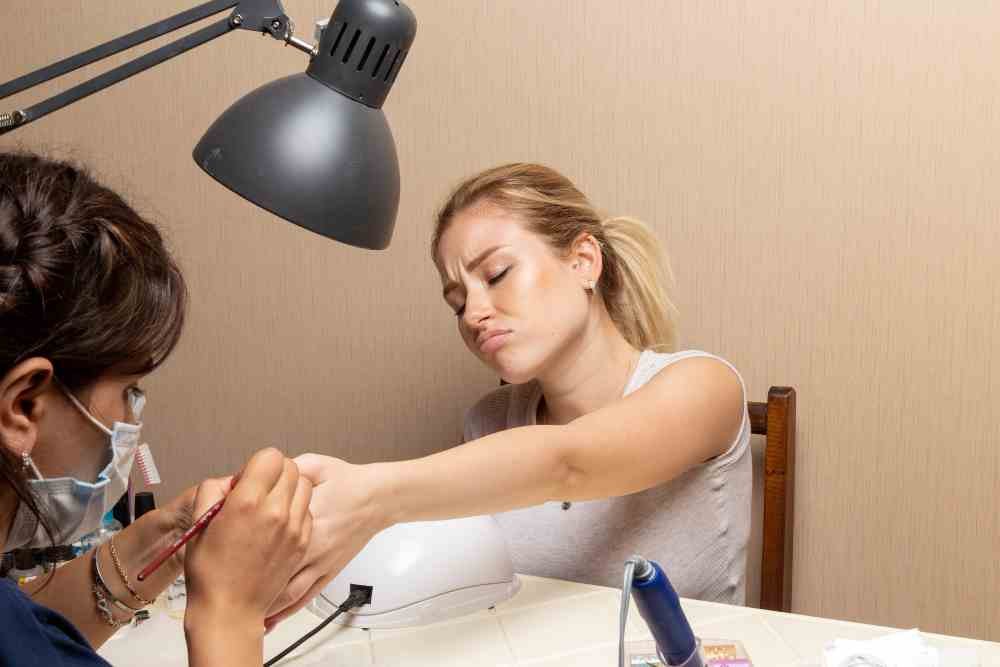
Step-by-Step Guide: How to Take Off Builder Gel at Home
Step 1: Prepare Your Workspace and Nails
Start by setting up a clean and organized workspace.
- Wash your hands thoroughly to remove dirt and oils.
- Sanitize all tools to prevent infections.
- Trim your nails if they are too long for easier removal.
Step 2: File the Top Layer of Builder Gel
Use a nail file with 180 grit to gently file away the shiny top coat of the builder gel.
- Focus on removing the gloss but avoid filing too deeply into the gel or natural nail.
- This step helps the acetone penetrate the gel more effectively.
Step 3: Soak Cotton Balls in Acetone
Use 100% pure acetone for the best results.
- Saturate a cotton ball or pad with acetone.
- Avoid over-soaking to prevent dripping.
Step 4: Wrap Nails with Acetone-Soaked Cotton and Aluminum Foil
Wrap each nail with the acetone-soaked cotton ball, then secure it with aluminum foil.
- Ensure the foil is tight enough to keep the cotton in place but not too tight to cause discomfort.
- Leave the wraps on for 15-20 minutes to soften the gel.
- Avoid acetone contact with the skin to prevent irritation.
Step 5: Check and Remove the Builder Gel
After 15-20 minutes, gently remove the foil and cotton from one nail.
- Use an orangewood stick or cuticle pusher to carefully scrape off the softened gel.
- If the gel resists removal, re-wrap the nail with acetone and wait an additional 5-10 minutes.
- Be gentle to avoid damaging the nail surface.
Step 6: Buff and Smooth Nails
Once all the gel is removed, use a nail buffer to smooth out any remaining residue.
- Lightly buff the surface of each nail to restore its natural texture.
- Avoid over-buffing, as this can thin the nails.
Step 7: Moisturize and Care for Your Nails Post-Removal
After buffing, apply cuticle oil and massage it into your nail beds.
- Follow up with a rich hand moisturizer to hydrate your skin and nails.
- Consider using a nail strengthening treatment to promote recovery.
Alternative Methods to Remove Builder Gel at Home
Using an Electric Nail File
An electric nail file can speed up the removal process by filing off the gel layers.
- Pros: Quicker and more efficient.
- Cons: Requires skill to avoid over-filing and damaging the natural nail.
Soaking Method vs. Peeling
While soaking in acetone is effective, peeling off gel manually is highly discouraged.
- Peeling removes layers of the nail plate, causing thinning and damage.
When to Consider Professional Removal
If you’re unsure of your technique or lack the necessary tools, seek help from a professional nail technician.
Common Mistakes to Avoid When Removing Builder Gel at Home
- Peeling or Scraping Gel: Never forcefully peel off builder gel, as it damages the nail plate.
- Skipping the Filing Step: Filing the top layer is essential for acetone penetration.
- Leaving Acetone On Too Long: Over-soaking can dry out and irritate the skin.
- Neglecting Nail Hydration: Always moisturize your nails and hands after removal.
How to Care for Your Nails After Removing Builder Gel
Nail Recovery Tips
- Hydrate daily with cuticle oil to nourish nail beds.
- Use a nail-strengthening treatment to rebuild nail structure.
- Avoid harsh chemicals or excessive water exposure during recovery.
Recommended Products
- Nail strengthening serums
- Hydrating hand creams
- Keratin-based nail masks
When to Apply New Gel or Polish
Wait at least 1-2 weeks to allow your nails to recover before applying new builder gel or polish.
Frequently Asked Questions (FAQs)
Can I Remove Builder Gel Without Acetone?
While acetone is the most effective method, alternatives like filing are possible but more time-consuming.
How Often Can I Safely Wear Builder Gel Nails?
It’s recommended to give your nails a break every 2-3 months to maintain nail health.
What if My Nails Feel Weak After Removal?
Use strengthening treatments and keep nails hydrated to restore their strength.
How to Avoid Builder Gel Lifting or Chipping?
Ensure proper application, avoid overexposure to water, and moisturize your cuticles regularly.
Conclusion
Learning how to take off builder gel at home is essential for maintaining healthy nails without the need for frequent salon visits. By following this step-by-step guide, you can safely and effectively remove builder gel while avoiding damage to your natural nails. Remember to take your time, use the proper tools, and care for your nails post-removal to keep them strong and beautiful. Share your experiences or ask questions in the comments below—your nails will thank you!