

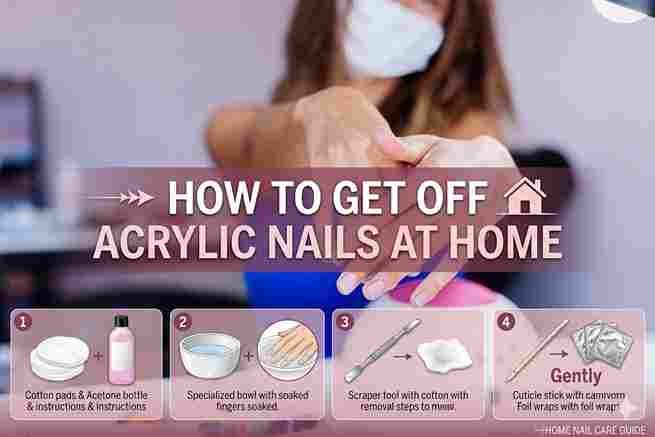
Whether your acrylic nails have grown out or you’re craving a new look, learning how to get off acrylic nails at home can save you both time and money. While professional nail removal is always an option, DIY methods allow you to remove acrylics comfortably and conveniently. In this guide, we’ll show you step-by-step techniques to safely remove acrylic nails at home without damaging your natural nails.
Things You Should Know Before Removing Acrylic Nails at Home
Why Proper Removal Is Important
Improperly removing acrylic nails can cause significant damage to your natural nails. Pulling or forcing the acrylic off can lead to thinning, peeling, or painful nail beds. Taking a patient and gentle approach ensures your nails remain healthy and strong throughout the process.
Tools and Materials You’ll Need
Before starting, gather these essential items:
- Acetone (100% pure): Essential for dissolving acrylic.
- Cotton balls or pads: To soak and apply acetone.
- Aluminum foil strips or nail clips: To hold the cotton in place.
- Nail file and buffer: For prepping and finishing.
- Cuticle pusher or orange stick: To gently remove softened acrylic.
- Bowl (optional): For the soaking method.
- Cuticle oil and hand moisturizer: For aftercare.
These items are affordable and can usually be found in your home or at a local store.
Step-by-Step Guide: How to Get Off Acrylic Nails at Home
Method 1: Soaking in Acetone
This is one of the most common and effective ways to remove acrylic nails.
- File down the top layer: Use a coarse nail file to remove the shiny finish from the acrylic nails. This allows the acetone to penetrate more effectively.
- Soak your nails: Pour acetone into a bowl and soak your nails for 20–30 minutes.
- Gently remove the acrylic: Use a cuticle pusher to lift and remove the softened acrylic. Repeat the soaking process if needed.
- Buff your nails: Smooth out any remaining residue using a nail buffer.
Pro Tip: Place the bowl of acetone over warm water to speed up the process, but never heat acetone directly as it’s highly flammable.
Method 2: Foil Wrap Technique
This method is less messy and keeps the acetone concentrated on your nails.
- Prep your nails: File the top layer of the acrylics to remove the shiny coat.
- Apply acetone-soaked cotton: Soak cotton balls in acetone and place one on each nail.
- Wrap your nails: Secure the cotton balls with aluminum foil or nail clips to hold them in place.
- Wait and remove: Let the wraps sit for 20–30 minutes, then gently scrape off the softened acrylic with a cuticle pusher.
- Buff and clean: Use a buffer to remove any remaining acrylic residue.
Pro Tip: Nail clips are a reusable and eco-friendly alternative to foil.
Method 3: Non-Acetone Removal (Gentle Option)
If you prefer a gentler approach, this method uses warm, soapy water instead of acetone.
- Trim your nails: Cut the acrylic nails as short as possible.
- Soak in soapy water: Fill a bowl with warm water and add a few drops of dish soap. Soak your nails for 20–30 minutes.
- Remove the acrylic: Use a cuticle pusher to lift and gently scrape off the acrylic. Repeat the soaking process if necessary.
- Buff and moisturize: Smooth your nails with a buffer and apply cuticle oil to restore moisture.
This method is ideal for those with sensitive skin or allergies to acetone but requires more patience and effort.
Aftercare Tips for Natural Nails
Hydration and Moisturizing
Acetone can dry out your nails and skin, so it’s important to replenish moisture:
- Apply cuticle oil to hydrate and nourish your nail beds.
- Use a rich hand cream to keep your skin soft and moisturized.
Strengthening and Repairing
Your nails may feel weak after removing acrylics. Strengthen them with these tips:
- Use a nail strengthener or keratin treatment to rebuild nail health.
- Avoid applying new acrylics or gel manicures for at least 1–2 weeks to allow your nails to recover.
Gentle Nail Care Routine
Take extra care of your nails to prevent damage:
- Keep nails trimmed and buffed to avoid peeling or breakage.
- Wear gloves when doing household chores to protect your nails from harsh chemicals.
Common Mistakes to Avoid When Removing Acrylic Nails at Home

To protect your natural nails, avoid these common mistakes:
- Pulling or forcing acrylics off: This can cause severe damage and pain.
- Skipping the filing step: Filing the top layer ensures acetone penetrates effectively.
- Rushing the process: Not soaking long enough can lead to incomplete removal and damage.
- Neglecting aftercare: Weak nails are more prone to breakage without proper hydration and strengthening.
Frequently Asked Questions About Acrylic Nail Removal
How Long Does It Take to Remove Acrylic Nails?
On average, it takes 30 minutes to an hour, depending on the method and the thickness of the acrylics.
Can I Remove Acrylic Nails Without Acetone?
Yes, using warm, soapy water is an alternative method, but it’s less effective and takes more time.
How Can I Minimize Damage to My Natural Nails?
Be gentle during the removal process, avoid rushing, and always hydrate and strengthen your nails afterward.
When to Seek Professional Help
If your acrylic nails are particularly thick, stubborn, or if your natural nails are already damaged, it’s best to consult a professional. Nail technicians have the tools and expertise to remove acrylics safely while minimizing damage. They can also provide personalized aftercare recommendations.
Conclusion
Removing acrylic nails at home is safe and achievable with the right tools, methods, and patience. By following our step-by-step guide and prioritizing aftercare, you can protect your natural nails and keep them healthy. Now that you know how to get off acrylic nails at home, give these methods a try and enjoy beautiful, damage-free nails!
We’d love to hear about your experiences or tips for removing acrylic nails. Let us know in the comments below!
