
Introduction
Dreaming of salon-quality nails without leaving your house? Wondering how to use gel nail polish at home like a pro? You’re in the right place! Gel nails have become increasingly popular for their durability, long-lasting shine, and professional finish. The good news is that with the right tools and techniques, you can achieve flawless gel nails from the comfort of your home. This guide will walk you through everything you need to know, from preparation to application and removal, so you can master gel nail polish at home.
What Is Gel Nail Polish?
Definition
Gel nail polish is a long-lasting, chip-resistant polish that is cured under a UV or LED lamp. Unlike regular nail polish, gel polish hardens into a durable layer that can last up to 2–3 weeks.
Benefits of Gel Nail Polish
- Long-lasting: Stays chip-free for weeks.
- High-gloss finish: Provides a shiny, professional look.
- Quick drying: Cures instantly under a UV or LED lamp.
Comparison with Regular Nail Polish
Gel polish offers greater durability and a faster drying process compared to regular nail polish, which can take hours to dry and chip within a few days.
Understanding these benefits clarifies how to use gel nail polish at home effectively.
Tools and Supplies You’ll Need
Essential Tools
- UV or LED Lamp: Necessary for curing the gel polish and ensuring it hardens properly.
- Gel Base Coat and Top Coat: Essential for creating a long-lasting manicure.
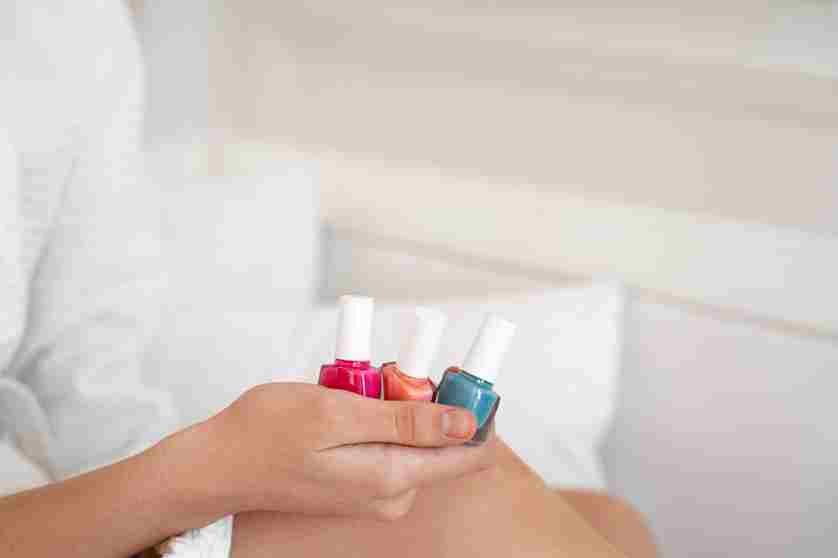
- Gel Nail Polish Colors: Start with beginner-friendly shades like nudes or pastels.
Additional Supplies
- Nail Buffer and File: For shaping and smoothing nails.
- Cuticle Pusher and Clippers: To prep the nail bed.
- Lint-Free Wipes: Prevent fuzz from ruining the polish.
- Isopropyl Alcohol (70% or higher): Used to wipe off the tacky layer after curing.
Optional Items
- Nail art tools for creative designs.
- Cuticle oil for moisturizing after application.
Pro Tip: Consider investing in a beginner gel nail kit that includes most of these tools for convenience.
Gathering the right tools is the first step in mastering how to use gel nail polish at home.
Preparing Your Nails for Gel Polish Application
Step 1: Clean Your Nails
Wash your hands with soap and water, then wipe your nails with isopropyl alcohol to remove dirt and oils.
Step 2: Shape Your Nails
Use a nail file to shape your nails into your desired style, such as square, round, or almond.
Step 3: Buff the Surface
Lightly buff the surface of your nails to remove shine and create a rough texture for better adhesion.
Step 4: Push Back Cuticles
Use a cuticle pusher to gently push back cuticles and trim any excess skin for a clean nail bed.
Step 5: Apply a Dehydrator or Primer (Optional)
If you want extra adhesion and longevity, apply a nail dehydrator or primer before the base coat.
Pro Tip: Avoid over-buffing, as it can weaken your natural nails.
Preparing your nails properly is essential when learning how to use gel nail polish at home.
Step-by-Step Guide: How to Use Gel Nail Polish at Home
Step 1: Apply the Base Coat
Apply a thin layer of gel base coat, making sure to avoid touching the skin or cuticles. Cure under the UV/LED lamp for 30–60 seconds, depending on the lamp.
Step 2: Apply the Gel Nail Polish Color
Apply a thin, even layer of gel polish color. Cure under the lamp after each layer. Most colors require 2–3 coats for full opacity.
Step 3: Seal with a Top Coat
Apply a thin layer of gel top coat to seal the color and add shine. Cure under the lamp for the recommended time.
Step 4: Wipe Off the Tacky Layer
After curing the top coat, use a lint-free wipe soaked in isopropyl alcohol to remove the sticky residue.
Step 5: Final Touches
Apply cuticle oil to moisturize the surrounding skin and finish your manicure.
Pro Tip: Thoroughly cure each layer to prevent smudging or lifting.
Following these steps ensures success in how to use gel nail polish at home.
Tips for Perfect Gel Nail Application
Use Thin Layers
Thin layers prevent bubbling and ensure even curing.
Avoid Flooding the Cuticles
Clean up any excess polish before curing to avoid lifting.
Cure Each Layer Fully
Follow the curing times recommended for your lamp and polish.
Cap the Free Edge
Seal the tips of your nails with polish to increase durability.
Practice Patience
Take your time to ensure a flawless application.
Pro Tip: Practice on a nail wheel or fake nails if you’re a beginner.
These tips are essential for mastering how to use gel nail polish at home.
Common Mistakes to Avoid When Using Gel Nail Polish
Skipping Nail Prep
Failing to clean or buff nails properly can lead to peeling.
Using Thick Layers
Thick layers may not cure properly and can cause lifting.
Over-Curing or Under-Curing
Improper curing can affect the polish’s longevity. Follow the lamp’s instructions.
Neglecting the Free Edge
Not sealing the tips of your nails can lead to chipping.
Using the Wrong Lamp
Ensure your lamp matches the type of gel polish (UV or LED) you’re using.
Avoiding these mistakes improves your results when learning how to use gel nail polish at home.
How to Remove Gel Nail Polish at Home
File the Top Layer
Gently file the shiny top coat to break the seal.
Soak in Acetone
Soak cotton balls in acetone, place them on your nails, and wrap each finger with foil. Leave for 10–15 minutes.
Gently Remove the Polish
Use a cuticle pusher or orange stick to lift the softened gel. Avoid scraping too hard.
Buff and Moisturize
Buff away any residue and apply cuticle oil to hydrate your nails.
Pro Tip: Never peel off gel polish, as it can damage your natural nails.
Proper removal is an important part of mastering how to use gel nail polish at home.
Benefits of Using Gel Nail Polish at Home
Cost-Effective
Save money by avoiding regular salon visits.
Convenience
Do your nails on your own schedule without needing an appointment.
Customization
Experiment with colors, designs, and nail art from the comfort of your home.
Long-Lasting Results
Enjoy up to 2–3 weeks of chip-free wear.
Confidence Boost
Professional-looking nails can elevate your mood and style.
These benefits highlight why many people learn how to use gel nail polish at home.
Frequently Asked Questions (FAQs)
Can I use gel nail polish without a UV/LED lamp?
No, gel polish requires curing under a UV or LED lamp to harden properly.
How long does gel nail polish last?
Gel polish typically lasts 2–3 weeks without chipping or fading.
What’s the best way to prevent peeling or lifting?
Proper nail prep, thin layers, and sealing the free edge are key to preventing peeling.
How many coats of gel polish should I apply?
Most colors require 2–3 thin coats for full opacity.
Is gel nail polish safe for natural nails?
Yes, if applied and removed correctly, gel polish is safe for natural nails.
These FAQs address common concerns about how to use gel nail polish at home.
Conclusion
Learning how to use gel nail polish at home allows you to achieve salon-quality nails without the expense or hassle of visiting a professional. By following the steps outlined in this guide, you can create stunning, long-lasting manicures with ease. Gather your tools, practice your technique, and enjoy the confidence that comes with perfectly polished nails. Start your at-home gel nail journey today!