
Introduction
Have you been wondering how to remove lash extensions at home safely without damaging your natural lashes? Whether you’re dealing with uneven lash growth, irritation, or simply want to take a break from extensions, removing them at home can seem daunting. But with the right tools and techniques, you can do it safely and effectively, saving time and money on a salon visit. In this article, you’ll learn everything you need to know about how to remove lash extensions at home. From understanding lash extensions to step-by-step instructions, common mistakes to avoid, and aftercare tips, we’ve got you covered. Let’s dive in!
Understanding Lash Extensions
What Are Lash Extensions?
Lash extensions are semi-permanent fibres, usually made of synthetic material, silk, or mink, that are individually bonded to your natural lashes using a specialized adhesive. They are an excellent way to enhance the length, curl, and fullness of your lashes without the need for mascara or strip lashes.
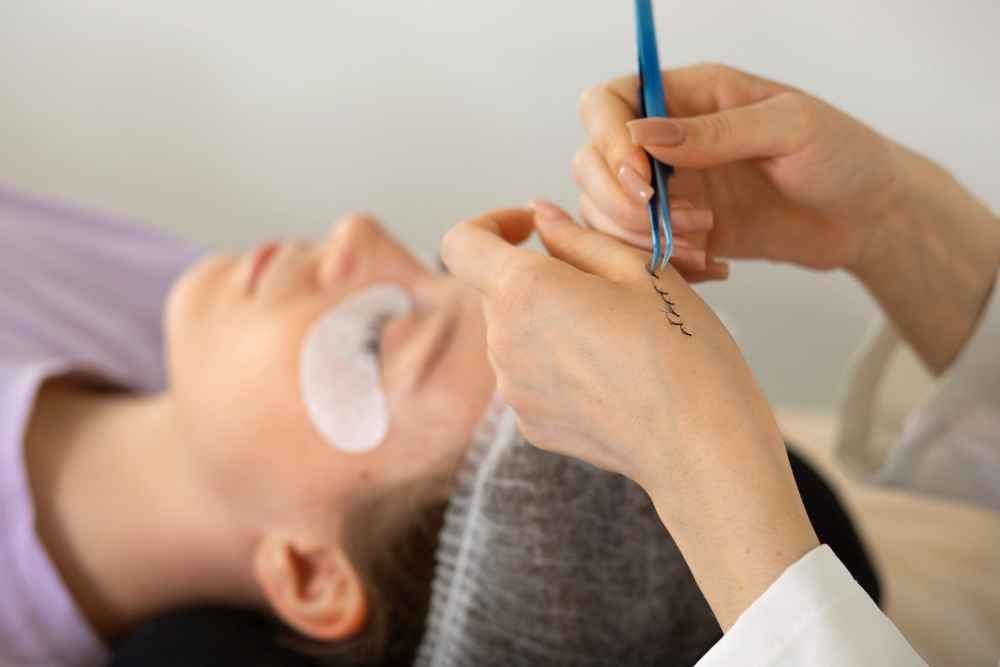
How Lash Extensions Are Attached
Applying lash extensions involves carefully isolating each natural lash and attaching an extension to it using a professional-grade adhesive. This glue is designed to be long-lasting but gentle enough not to harm your natural lashes.
Why You Should Be Careful Removing Them at Home
The adhesive used for lash extensions is strong, and improper removal can damage your natural lashes or cause irritation. Professional removal is often recommended, but with the right techniques, you can safely remove them yourself.
Signs It’s Time to Remove Lash Extensions
When to Remove Lash Extensions
It may be time to remove your lash extensions if you notice the following: uneven lash growth or gaps in your extensions, irritation or discomfort around your eyes, or extensions that are clumping together or losing their curl.
Why You Shouldn’t Let Them Fall Out Naturally
While lash extensions will eventually shed naturally as your lashes grow, waiting too long can lead to clumping, discomfort, or even damage to your natural lashes. Removing them proactively can save you from these issues.
Preparations Before Removing Lash Extensions at Home
Things You’ll Need
Before you begin, gather the following items: coconut oil, olive oil, or a lash-safe remover; a bowl of hot water for steaming; cotton pads or swabs; a clean towel; and a gentle cleanser or micellar water.
Patch Test for Safety
Always test any oil or product on a small patch of skin to ensure you don’t have an allergic reaction. This is especially important for sensitive skin around the eyes.
Set Up a Comfortable Space
Create a relaxing environment for the process. Sit in a well-lit area, have a mirror nearby, and ensure your hands and tools are clean.
Step-by-Step Guide: How to Remove Lash Extensions at Home
Step 1: Soften the Adhesive Using Steam
Fill a bowl with hot water and place your face above the bowl, keeping a safe distance to avoid burns. Cover your head with a towel to trap the steam and allow it to loosen the adhesive for about 10-15 minutes. Gently pat your face dry with a clean towel.
Step 2: Apply Oil to Break Down the Adhesive
Choose a lash-safe oil like coconut oil, olive oil, or baby oil. Use a cotton swab or pad to gently apply the oil to your lash line. Let the oil sit for a few minutes to soften the glue further.
Step 3: Gently Remove the Extensions
Using clean fingers or a cotton pad, gently slide the extensions off your natural lashes. Do not pull or tug, as this can damage your natural lashes. If some extensions are stubborn, reapply oil and wait a bit longer before trying again.
Step 4: Clean and Hydrate Your Natural Lashes
Wash your face with a gentle cleanser to remove any remaining adhesive or oil. Apply a lash serum or natural oil (like castor oil) to nourish your lashes.
Common Mistakes to Avoid When Removing Lash Extensions
Pulling or Tugging
Never pull or tug at your lash extensions. This can cause pain and damage your natural lashes.
Using Harsh Chemicals
Avoid using acetone or any other harsh chemicals that could irritate your eyes or damage your lashes.
Skipping Aftercare
Failing to care for your lashes post-removal can leave them brittle and prone to breakage. Always follow up with proper aftercare.
Aftercare Tips for Healthy Natural Lashes
Hydrating and Nourishing Your Lashes
Use a lash serum or natural oils like castor oil to hydrate and strengthen your lashes. These products can promote growth and repair.
Taking a Break from Extensions
Give your lashes time to recover before applying new extensions. This helps maintain the health of your natural lashes.
Proper Lash Care Routine
Avoid rubbing your eyes. Use a gentle eye makeup remover. Skip waterproof mascara, which can be hard to remove and harsh on lashes.
Professional vs. DIY Lash Removal: Pros and Cons
When to Seek Professional Help
If your lash extensions were applied using a particularly strong adhesive or if you’re experiencing irritation, it’s best to visit a professional for safe removal.
Benefits of DIY Removal
Removing lash extensions at home can be convenient and cost-effective. With the right tools and techniques, you can achieve great results.
Risks of DIY Removal
DIY removal carries the risk of damaging your natural lashes if done improperly. Always follow the steps carefully to minimize risks.
FAQs About Removing Lash Extensions at Home
Can I Remove Lash Extensions Without Oil?
Yes, you can use a lash-safe remover or rely on steaming alone, but oil is generally more effective at breaking down the adhesive.
How Long Does It Take to Remove Lash Extensions?
The process can take anywhere from 20-40 minutes, depending on how many extensions you have and the adhesive used.
Will My Natural Lashes Be Damaged?
If you follow the proper steps and avoid pulling, your natural lashes should remain healthy.
How Often Should I Remove Lash Extensions?
You should remove or replace extensions every 4-6 weeks to prevent buildup or clumping.
What Are the Best Oils for Lash Removal?
Coconut oil, olive oil, and baby oil are all effective and safe options for lash removal.
Conclusion: Removing Lash Extensions Safely at Home
Removing lash extensions at home doesn’t have to be intimidating. By following the steps outlined above, you can safely and effectively remove your extensions while protecting the health of your natural lashes. Remember to take your time, avoid common mistakes, and prioritize aftercare to keep your lashes looking their best. If you’ve tried this method, we’d love to hear about your experience! Share your thoughts in the comments below, and don’t forget to check out our other beauty tips for maintaining healthy, gorgeous lashes.