
Introduction
Imagine having salon-quality gel nails without stepping out of your home or spending a fortune! Gel nails have become increasingly popular for their durability and professional look, but did you know you can achieve the same results at home? Learning how to do gel nails at home is not only convenient and cost-efficient but also gives you the freedom to experiment with designs and colors. This guide will walk you through the step-by-step process, share tips for beginners, and highlight common mistakes to avoid.
What Are Gel Nails?
Definition of Gel Nails
Gel nails are a type of manicure that uses a gel-based polish cured under UV or LED light. They are known for their durability, high-shine finish, and resistance to chipping, making them a favorite among beauty enthusiasts.
Benefits of Gel Nails
- Long-lasting results that can last up to 2-3 weeks
- Glossy, professional-looking finish
- Quick-drying process under a curing lamp
Gel Nails vs. Regular Polish
Unlike regular nail polish, gel nails are more durable and resistant to chipping. The application process involves curing each layer under a lamp, which ensures a longer-lasting and flawless finish. While regular polish may be quicker to apply, gel nails offer better value for their longevity.
Why More People Are Doing Gel Nails at Home
Many people are opting to do gel nails at home to save on salon costs while enjoying the flexibility to try various designs. With affordable gel nail kits readily available, it’s easier than ever to achieve professional results from the comfort of your home.
What You’ll Need to Do Gel Nails at Home
Gel Nail Kit Essentials
- UV or LED lamp: Essential for curing gel polish. LED lamps cure faster, while UV lamps are compatible with all gel polishes.
- Base coat, gel polish, and top coat: Each layer plays a crucial role in achieving long-lasting results.
- Nail file and buffer: Prepping the nails ensures proper adhesion.
- Cuticle pusher and cuticle oil: For a clean and polished look.
- Alcohol wipes or lint-free pads: To clean the nail surface and remove the sticky layer after curing.
- Optional: Nail primer, nail art tools, and stickers for added creativity.
Budget-Friendly vs. Professional Kits
Beginners may start with affordable kits that include all the essentials, while professional kits offer higher-quality tools and products. Many online retailers and beauty stores offer a range of options to suit every budget.
Safety Precautions
- Protect your skin and eyes from UV or LED light exposure by wearing protective gloves or using a lamp with a shield.
- Ensure good ventilation while applying gel polish to avoid inhaling fumes.
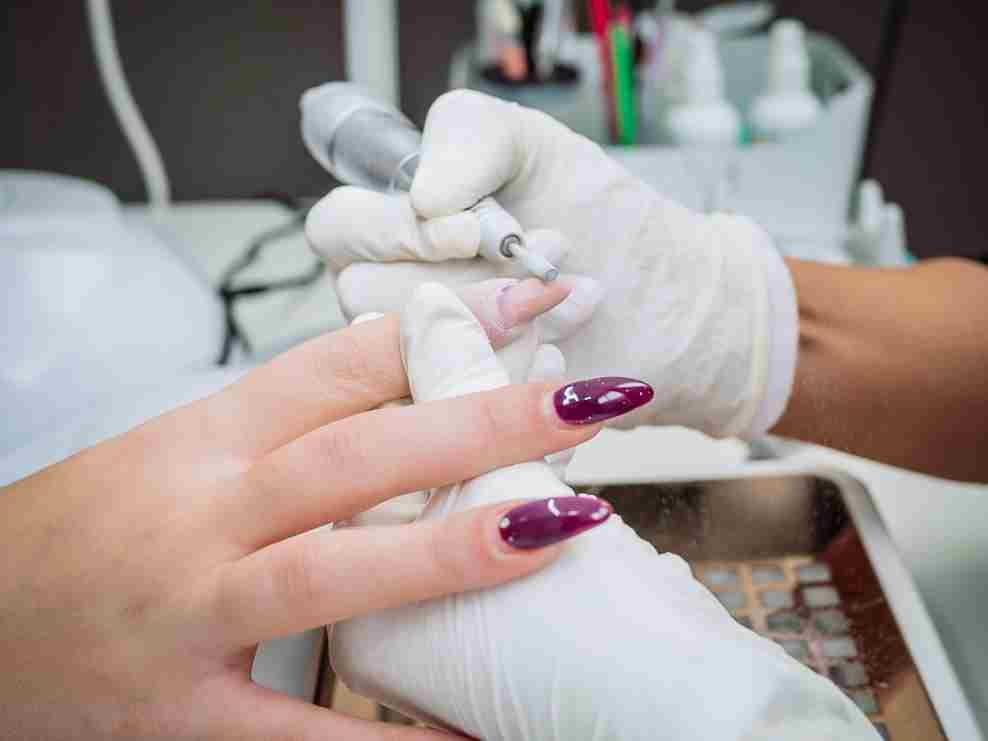
Step-by-Step Guide: How to Do Gel Nails at Home
Step 1: Prepare Your Nails
- Remove any old nail polish using acetone.
- Trim, shape, and file nails to your desired length and shape.
- Push back and trim excess cuticles for a clean base.
- Buff the nail surface gently to remove shine and ensure better adhesion.
- Clean the nails with alcohol wipes to remove dust and oils.
Step 2: Apply the Base Coat
Start with a thin layer of base coat to protect your natural nails and ensure the gel polish adheres properly. Avoid pooling at the cuticles and cure under a UV/LED lamp for 30-60 seconds, depending on your lamp.
Step 3: Apply the Gel Polish
- Choose your desired gel polish color.
- Apply thin, even layers to avoid bubbling and uneven texture.
- Cure each layer under the lamp for 30-60 seconds before applying the next coat.
- Avoid letting the polish touch the skin or cuticles to prevent lifting.
Step 4: Apply the Top Coat
Seal in the color with a thin layer of top coat for a high-shine finish. Fully cure the top coat under the lamp to ensure it sets properly, preventing smudging or peeling.
Step 5: Remove the Sticky Layer
After curing, use alcohol wipes or a lint-free pad soaked in isopropyl alcohol to remove the sticky residue. This step ensures a smooth and glossy finish.
Step 6: Hydrate Your Cuticles
Finish your manicure by applying cuticle oil to hydrate and nourish the skin around your nails. Massage it gently for a polished look.
Nail Art Ideas for Gel Nails
Simple Designs for Beginners
- Classic French tips
- Glitter accents for a touch of sparkle
- Ombre effect using a sponge
Advanced Nail Art Techniques
- Using nail stamping kits for intricate patterns
- Freehand designs with nail art brushes
- Adding rhinestones or gems for a glamorous look
Seasonal and Trendy Designs
- Festive holiday-themed designs
- Minimalist trends like negative space nail art
- Popular colors and patterns for the current year
Common Mistakes to Avoid
Skipping Nail Prep
Failing to clean and buff nails can lead to peeling or lifting of the gel polish.
Applying Thick Layers
Thick layers can cause uneven curing, bubbling, or smudging. Always apply thin, even coats.
Over-Curing or Under-Curing
Improper curing can result in sticky or dull nails. Follow your lamp’s instructions for the correct curing time.
Getting Gel Polish on the Skin
Polish on the skin or cuticles can cause lifting and irritation. Use a small brush to clean up any excess before curing.
Not Using the Right Tools
Low-quality lamps or polishes may lead to unsatisfactory results. Invest in reliable tools for the best experience.
How to Remove Gel Nails at Home
Why Proper Removal is Important
Improper removal can damage your natural nails. Always follow a safe removal process.
Step-by-Step Removal Process
- File the top coat gently to break the seal.
- Soak cotton balls in acetone and place them on each nail.
- Wrap nails in aluminum foil and let them soak for 10-15 minutes.
- Use a cuticle pusher to gently remove the softened gel polish.
- Buff nails lightly and hydrate with cuticle oil.
What Not to Do
- Avoid peeling or prying off the gel polish, as this can weaken the nail bed.
- Skipping the soaking step can cause unnecessary damage.
Tips for Long-Lasting Gel Nails
- Proper Nail Prep: Clean, buff, and shape nails carefully before starting.
- Seal the Edges: Cap the free edge of your nails with polish to prevent chipping.
- Avoid Water Exposure: Wait a few hours before swimming or washing dishes.
- Use Gloves for Chores: Protect your nails from harsh chemicals and water.
- Touch-Up Tips: Fix chips or cracks without redoing the entire manicure.
Benefits of Doing Gel Nails at Home
Cost Savings
Save money on salon visits by investing in a gel nail kit.
Customization
Enjoy the freedom to experiment with colors, designs, and techniques.
Convenience
Do your nails anytime, anywhere, without the need for appointments.
Skill Development
Improve your technique with practice and gain confidence in your DIY abilities.
Stress Relief
Turn gel nail application into a relaxing self-care activity.
Frequently Asked Questions (FAQ)
Is it hard to do gel nails at home?
With the right tools and practice, anyone can achieve great results.
How long do gel nails last?
Properly applied gel nails can last up to 2-3 weeks.
Can I do gel nails without a UV/LED lamp?
A curing lamp is essential for setting the gel polish and ensuring durability.
What’s the best gel nail kit for beginners?
Look for affordable kits that include all the basics, such as a lamp, polish, and tools.
Can gel nails damage natural nails?
When applied and removed correctly, gel nails should not damage your natural nails.
How do I fix mistakes during the application process?
Clean up smudges or uneven polish with a small brush dipped in acetone before curing.
Conclusion
Learning how to do gel nails at home is a fun and rewarding experience. With the right tools, proper technique, and a bit of practice, you can achieve salon-quality results without leaving your house. Remember to follow the step-by-step guide, avoid common mistakes, and take good care of your nails for the best results. Ready to try it out? Share your experiences or ask questions in the comments below!