

Introduction
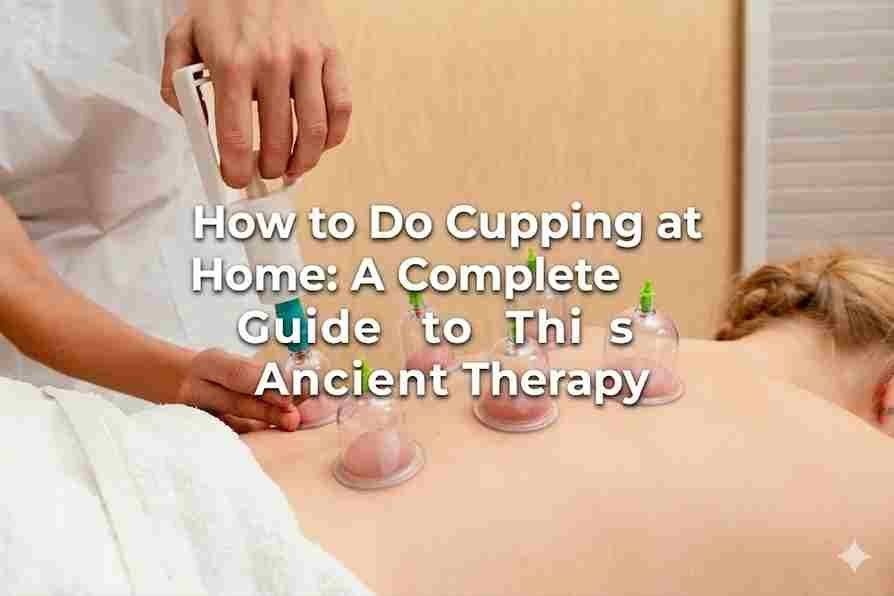
Looking for a natural way to relieve muscle tension and boost circulation? Cupping therapy might be the solution you’re searching for! As an ancient healing practice, cupping has gained enormous popularity in recent years, especially among those seeking alternative wellness methods. While traditionally performed by professionals, learning how to do cupping at home can empower you to incorporate this beneficial therapy into your self-care routine safely and effectively.
This comprehensive guide will walk you through everything you need to know about cupping, including its benefits, the tools required, step-by-step instructions, and safety precautions. By the time you finish reading, you’ll feel confident enough to start your first at-home cupping session.
Understanding Cupping Therapy
What is Cupping?
Cupping is an ancient therapeutic practice rooted in Traditional Chinese Medicine (TCM), though it has also been used in other cultures such as Egyptian and Middle Eastern healing traditions. The technique involves placing special cups on the skin to create suction. This suction stimulates blood flow, reduces muscle tension, and promotes relaxation.
Types of Cupping
- Dry Cupping: The most common technique for at-home use, which involves creating suction without any incisions.
- Wet Cupping: Involves small skin incisions to draw out blood in addition to suction, but it’s only recommended for trained professionals.
- Fire Cupping: Uses a flame to heat the air inside the cup before placing it on the skin. While effective, it’s not recommended for beginners due to safety concerns.
Health Benefits of Cupping
Cupping offers a wide range of health benefits, including:
- Pain Relief and Muscle Relaxation: Loosens tight muscles and relieves chronic pain.
- Improved Blood Circulation: Enhances blood flow to target areas, promoting healing.
- Detoxification and Immune Support: Stimulates lymphatic drainage and supports the body’s natural detox processes.
- Stress Reduction and Relaxation: Helps release tension in the body, leading to a calming effect on the mind.
Is Cupping Safe to Do at Home?
Safety Considerations
Cupping is generally safe when performed correctly and with proper tools. However, it’s crucial to understand the risks and avoid overdoing it.
Who Should Avoid Cupping
Certain individuals should avoid cupping therapy, including:
- Pregnant women (without medical advice).
- People with skin conditions like eczema or psoriasis.
- Those with blood disorders, such as hemophilia, or who take blood-thinning medications.
Consulting Professionals
Before starting cupping at home, it’s recommended to consult a healthcare provider, especially if you have underlying health conditions or concerns.
Potential Side Effects
While cupping is considered safe, minor side effects may include:
- Bruising or circular marks that fade within a few days.
- Mild discomfort during or after the session.
- Temporary skin sensitivity.
Tools and Materials Needed for At-Home Cupping
Types of Cups
- Silicone Cups: Flexible and easy to use, making them ideal for beginners.
- Plastic Cups: Durable and often come with a suction pump for adjustable pressure.
- Glass Cups: Commonly used for professional fire cupping but require extra caution.
Additional Supplies
- Massage Oils or Lotions: Helps cups glide smoothly over the skin.
- Alcohol Wipes or Disinfectant: For cleaning cups before and after use.
- Optional Suction Pump: For precise suction control with plastic cups.
Where to Buy
You can purchase cupping sets from trusted online retailers like Amazon or wellness stores. Look for high-quality kits with positive reviews and detailed instructions.
Preparing for Your At-Home Cupping Session
Create a Comfortable Environment
Choose a quiet, clean, and relaxing space for your session. Ensure proper lighting and ventilation to make the experience enjoyable.
Prepare Your Skin
Cleanse the skin with soap and water, then apply a thin layer of massage oil or lotion to allow the cups to move smoothly.
Understand Your Body
Identify areas of muscle tension or pain that you want to target during the session.
Duration and Frequency
- Session Length: Cupping sessions should last between 5-15 minutes.
- Frequency: Start with one session per week and adjust based on how your body responds.
Step-by-Step Guide: How to Do Cupping at Home
Step 1: Choose the Cup Size and Area
Select the appropriate cup size based on the target area. For larger muscle groups like the back, use bigger cups, while smaller cups are ideal for areas like the neck or shoulders.
Step 2: Create Suction
- For Silicone Cups: Squeeze the cup to expel air and create suction when placed on the skin.
- For Plastic Cups: Use the suction pump to draw out air and create the desired pressure.
Step 3: Apply and Adjust Cups
Position the cups on the target muscles and adjust the suction intensity to ensure comfort. Avoid creating excessive suction that could cause pain or skin damage.
Step 4: Move or Static Cupping
- Static Cupping: Leave the cups in place for 5-10 minutes.
- Sliding Cupping: Gently move the cups over the muscles for a massage effect.
Step 5: Remove Cups Safely
Release the suction by gently lifting one edge of the cup. Avoid pulling the cups off forcefully to prevent skin injury.
Step 6: Aftercare
Clean the cups with disinfectant and wash the treated skin with warm water. Drink plenty of water to help flush out toxins and promote recovery.
Tips and Best Practices for Effective At-Home Cupping
Start Slowly
Begin with shorter sessions and lighter suction to allow your body to adjust to the therapy.
Avoid Sensitive Areas
Do not place cups over open wounds, varicose veins, or inflamed skin.
Consistency is Key
Regular sessions yield better results. Aim for weekly or bi-weekly cupping to experience the benefits.
Hydrate Well
Drink water before and after the session to support detoxification and prevent dehydration.
Common Mistakes to Avoid
Using Excessive Suction
Applying too much suction can cause bruising or skin damage. Always start with mild pressure and adjust as needed.
Ignoring Hygiene
Failing to clean the cups or skin can increase the risk of infection. Always maintain proper hygiene.
Overdoing Sessions
Performing cupping too frequently or for extended periods may irritate the skin and reduce effectiveness.
Cupping Contraindications
If you have medical conditions like blood disorders or skin infections, consult a doctor before trying cupping therapy.
Frequently Asked Questions (FAQ)
Does Cupping Hurt?
Cupping should not be painful. You may feel a pulling sensation, but it should be comfortable.
How Long Do Cupping Marks Last?
Cupping marks typically fade within a few days to a week, depending on your skin type and suction intensity.
Can I Do Cupping Every Day?
Daily cupping is not recommended. Allow at least a few days between sessions to give your skin time to recover.
Can Cupping Help with Chronic Pain?
Yes, cupping can be effective for managing chronic pain by improving circulation and reducing muscle tension.
Is Cupping Safe for Everyone?
Cupping is safe for most people, but those with certain health conditions should consult a healthcare provider before starting.
Additional Resources
Recommended Videos and Tutorials
Search YouTube for reliable cupping therapy tutorials from licensed professionals.
Books and Articles
Explore resources like The Art of Cupping to deepen your knowledge about the technique.
Where to Buy Quality Cupping Sets
Look for trusted brands like Lure Essentials or Hansol Cupping Therapy Kits online or at wellness stores.
Conclusion
Cupping therapy is an incredible way to relieve muscle tension, improve circulation, and promote relaxation—all from the comfort of your home. By following this guide on how to do cupping at home, you can safely and effectively enjoy the numerous benefits of this ancient practice.
Remember to start slow, prioritize safety, and consult a professional if you have any concerns. Have you tried cupping at home? Share your experience in the comments below, and don’t forget to subscribe for more self-care and wellness tips!
How to Home
