
Introduction
Have you ever wondered how to remove SNS nails at home without damaging your natural nails? SNS, also known as Signature Nail Systems, is a popular dipping powder manicure loved for its long-lasting, vibrant finish. While it’s durable, removing SNS at home can seem intimidating if you don’t know the right steps. Going to the salon every time can be costly and inconvenient, but with the right tools and techniques, you can safely and effectively remove SNS nails at home.
In this guide, you’ll learn how to remove SNS at home with step-by-step instructions, tips for protecting your nails, and advice on post-removal care to keep your nails healthy and strong.
What Are SNS Nails and Why Are They Popular?
What Are SNS Nails?
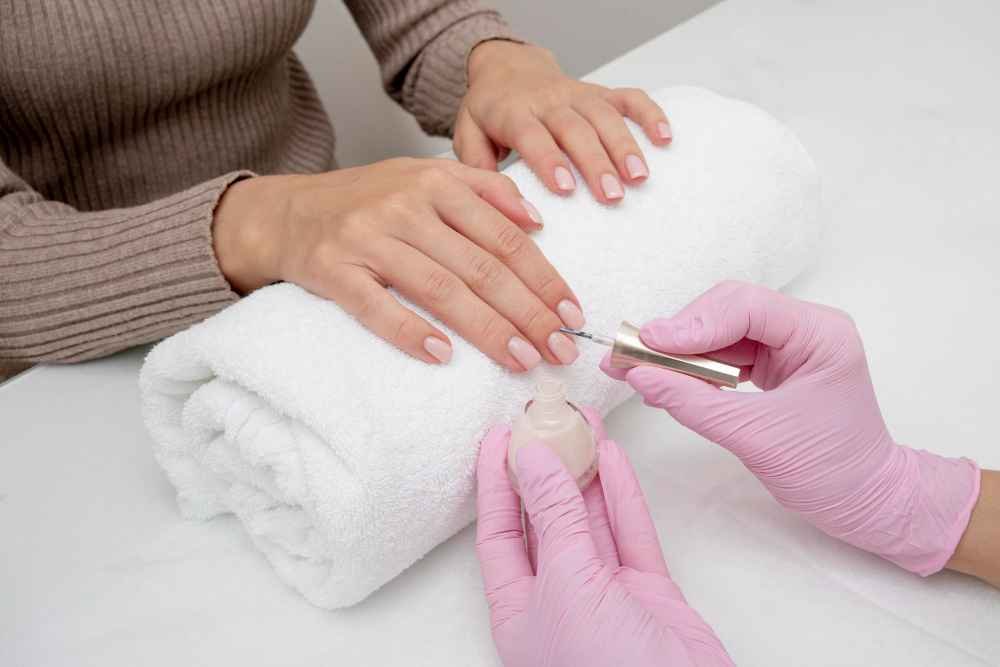
SNS nails involve a dipping powder system that uses a bonding agent and colored powder to create a durable, chip-resistant manicure. Unlike gel nails, they don’t require curing under UV light, and they tend to last longer than traditional nail polish.
Why Removal Is Important
Proper removal is essential to avoid damaging your natural nails. Peeling or forcing off SNS can weaken nail beds and cause breakage, so it’s important to follow the correct process. Salons use acetone and professional tools to safely remove SNS, but with the right preparation, you can recreate this process at home.
Can You Safely Remove SNS Nails at Home?
Yes, But With Caution
It’s completely safe to remove SNS nails at home, as long as you follow the proper steps and use the correct tools. Patience is key, as rushing the process can lead to nail damage.
Risks of Improper Removal
Improper removal methods, such as peeling off the SNS, can strip layers from your natural nails, leaving them weak and brittle. Over-buffing or skipping acetone can also cause unnecessary damage.
When to Seek Professional Help
While it’s possible to remove SNS at home, there are situations where visiting a salon is a better option. For instance, if the SNS layers are extremely thick or your nails are already damaged, a professional can remove them more safely.
Tools and Materials You’ll Need
Essentials for Removing SNS at Home
- 100% pure acetone or acetone-based nail polish remover.
- Nail buffer or file.
- Cotton balls or pads.
- Aluminum foil or reusable nail wraps.
- Orangewood stick or cuticle pusher.
- Bowl of warm water (optional).
- Moisturizer or cuticle oil for aftercare.
Optional Tools
- Electric nail file (for experienced users).
- Clips to secure cotton pads (as an alternative to foil).
Safety Precautions
Make sure to work in a well-ventilated area when using acetone to avoid inhaling strong fumes. Also, avoid prolonged contact between acetone and your skin to minimize dryness or irritation.
Step-by-Step Guide: How to Remove SNS at Home
Preparation
Start by washing your hands thoroughly and sanitizing your tools to ensure a clean and safe process. Trim your nails if necessary, as shorter nails are easier to work with. Protect your workspace by laying down a towel or mat to catch any spills.
Buffing the Top Layer
Use a nail buffer or file to gently remove the shiny topcoat of the SNS. This step helps acetone penetrate the layers more effectively. Be careful not to over-buff, as this can damage the surface of your natural nails.
The Foil and Cotton Ball Method
Step 1: Soak the Cotton Balls
Saturate a cotton ball with pure acetone or acetone-based nail polish remover.
Step 2: Wrap the Nails
Place the soaked cotton ball on your nail and wrap it tightly with a small piece of aluminum foil. Repeat this process for all fingers.
Step 3: Wait
Allow the foil-wrapped cotton balls to sit on your nails for 15-20 minutes.
Step 4: Remove the SNS
Unwrap each nail and use an orangewood stick or cuticle pusher to gently scrape off the softened SNS. If the SNS doesn’t come off easily, reapply acetone and wait a few more minutes.
Step 5: Clean Residue
Once all the SNS is removed, use a nail buffer to clean off any remaining residue.
The Soaking Bowl Method (Alternative)
Step 1: Prepare the Acetone
Fill a bowl with warm water and place a smaller bowl of acetone inside it to gently warm the acetone (never heat acetone directly).
Step 2: Soak Your Nails
Submerge your fingertips in the acetone for 10-15 minutes.
Step 3: Remove the SNS
After soaking, use a cuticle pusher to scrape off the softened SNS layers.
Step 4: Repeat if Necessary
If there are still stubborn patches, soak again and carefully scrape until all the SNS is removed.
Final Clean-Up
Wash your hands thoroughly with soap and water to remove any acetone residue. Buff your nails gently to smooth the surface and prepare them for aftercare.
Post-Removal Nail Care Tips
Rehydrate Your Nails
Acetone can be drying, so it’s important to rehydrate your nails after removal. Apply cuticle oil to restore moisture and follow up with a rich hand cream.
Strengthen Your Nails
Use a nail strengthener or hardener to repair and protect your nails after the removal process.
Give Your Nails a Break
Avoid reapplying SNS or any nail products for at least a week to allow your nails to recover.
Diet for Healthy Nails
Incorporate foods rich in biotin, such as eggs, nuts, and leafy greens, to promote nail strength and growth.
Regular Maintenance
Keep your nails trimmed and filed to prevent splitting or breakage.
Common Mistakes to Avoid When Removing SNS Nails at Home
Skipping the Buffing Step
Failing to buff the top layer can make the removal process take much longer, as the acetone won’t penetrate as effectively.
Peeling Off SNS
Peeling off SNS can damage the natural nail layers, leaving them weak and prone to breakage.
Using Non-Acetone Removers
Non-acetone removers are not strong enough to break down SNS layers effectively.
Rushing the Process
Patience is key. Trying to rush through the process can result in damage to your nails.
Neglecting Aftercare
Skipping aftercare can leave your nails dry and brittle. Always moisturize and strengthen your nails after removal.
FAQ Section: Common Questions About How to Remove SNS at Home
Can I remove SNS nails without acetone?
While it’s possible to file off SNS, acetone is the most effective method for safe and easy removal.
How long does it take to remove SNS nails at home?
The entire process typically takes 20-30 minutes, depending on the thickness of the SNS layers.
Will removing SNS at home damage my nails?
Not if done correctly. Following proper steps and aftercare can help maintain nail health.
How often should I take breaks from SNS nails?
It’s recommended to take a break every two to three months to allow your nails to recover.
Can I reuse the tools I use for removal?
Yes, but make sure to clean and sanitize them thoroughly after each use.
Key Takeaways
- Removing SNS at home is safe and cost-effective with the right tools and techniques.
- Patience and proper preparation are essential to avoid damaging your natural nails.
- Post-removal care, such as moisturizing and strengthening, is critical for maintaining healthy nails.
Conclusion
Learning how to remove SNS at home is a valuable skill that saves time and money while keeping your nails healthy. By following this guide step by step and prioritizing aftercare, you can achieve salon-quality results from the comfort of your home. Start your DIY nail care journey today and enjoy the benefits of beautiful, healthy nails!